# nodl Dojo SSD upgrade
Applies to:
nodl Dojo or nodl Dojo Mk.2 (2x1TB)
WARNING
If anything unexpected happens during the procedure or if you are unsure at any step, please contact us before continuing.
WARNING
Do not unlock the device (by entering the unlock password in the UI) before Step 11 when asked by the resize script. If you do so, you will slow down the resync process or it might fail or crash the device.
# Why Upgrade
If your SSD ran out of space due to the increasing size of the blockchain and indexes, you need to upgrade to a bigger drive. You may also need to upgrade or replace the SSD if it's running out of spare blocks (end of lifetime).
# Before you start
Required tools:
- 2mm hex (T8 Torx works too) key or driver
- Phillips head screwdriver
- Sharp knife or fishing line (to carefully separate the hard drive from the board)
Required parts:
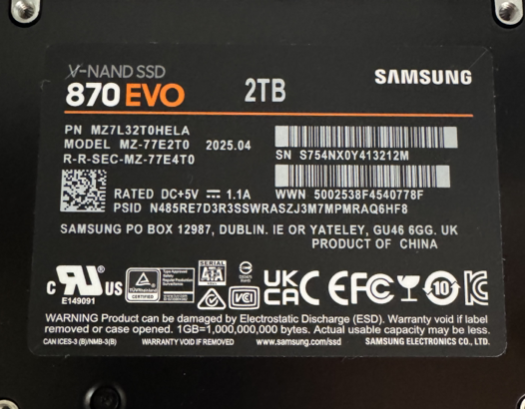
- 2 x 2.5" SATA SSD (2TB or 4TB) - our preference is the Samsung EVO 870 range
- Strip of double sided tape (optional)
# Step 1 - Pre-upgrade check
If you're using a Mac, open the Terminal app. On a recent Windows, open cmd.exe or PowerShell. On Linux, open any terminal of your choosing.
Run the following commands from your terminal.
ssh rock@NODL—NAME.local -p 22222
or
ssh rock@192.168.xx.yy -p 22222
Replace NODL-NAME with the actual two words name of your nodl or the IP address with the actual IP address.
When prompted, enter the SSH password (provided in the letter included with your device).
Gain permanent root access running:
sudo su -
Then check that the RAID arrays drive are healthy:
cat /proc/mdstat
The output should look like:
Personalities : [raid1]
md1 : active raid1 sda3[0] sdb3[1]
      949273408 blocks super 1.2 [2/2] [UU]
      bitmap: 0/8 pages [0KB], 65536KB chunk

md0 : active raid1 sda1[2] sdb1[1]
      19479232 blocks super 1.2 [2/2] [UU]

unused devices: <none>
We are looking for the [2/2] and [UU] for both md0 and md1. If one of them is different, DO NOT continue and contact support immediately.
WARNING
If the RAID arrays state is not healthy, do not continue this procedure and contact support!
# Step 2 - Turn of your nodl
To cleanly shutdown your nodl, type:
halt -p
Wait a few minutes until the lights stop blinking and the network lights turn off. Unplug the power adapter.
# Step 3 - Disassemble the nodl
Remove the L shaped USB bridge in the back.
Using a 2mm hex key or driver (or T8 Torx), remove the 4 screws on the sides of the device to open the case. Gently pull the sides away and remove the top case. Then remove the 6 screws in the bottom of the device. This will free its internals from the bottom part of the case.
Put the screws aside in a container to avoid misplacing them.
After the internals are removed from the case, firmly plug the L shaped USB bridge back into the device.
# Step 4 - Bypass the kill switch
To avoid having to reassemble the device fully after installing the first new SSD, you can bypass the kill switch so the device can run while being open. Look under the kill switch board, you'll find two jumpers. One of them is positionned on one pin. Remove the jumper and place it on both pins. Remember which jumper you move as you'll have to reverse this operation when reassembling the device at the end of the process.
# Step 5 – Remove and Replace the first SSD
- Use a sharp knife or fishing line to carefully separate cut the glue/double sided tape on the first drive, labelled HDD1.
- Remove the drive and install one of the two new drives in its place.
WARNING
The drives may also be attached with one or two philips screws. Check carefully if it's the case and unscrew them partially (no need to remove them totally).
# Step 6 - Power the device and log back into it
Plug the power adapter back in and wait a moment until the device has booted.
Run the following commands from your terminal.
ssh rock@NODL—NAME.local -p 22222
or
ssh rock@192.168.xx.yy -p 22222
Gain permanent root access running:
sudo su -
# Step 7 - Checks and rebuilding the RAID arrays (1)
Run:
ls /dev/sd*
to check if the new drive is properly detected. You should see:
/dev/sda /dev/sdb /dev/sdb1 /dev/sdb2 /dev/sdb3
Clone the repository containing scripts to setup the new drives:
git clone https://gitlab.lightning-solutions.eu/nodl/nodl-2tb-upgrade
Go into the freshly cloned directory:
cd nodl-2tb-upgrade
And run the script to setup the new /dev/sda drive:
./setup-sda.sh
You can check the progress of the rebuild by periodically runing:
cat /proc/mdstat
You should see something similar to:
Personalities : [raid1]
md0 : active raid1 sdb1[3] sda1[2]
      19479232 blocks super 1.2 [2/1] [U_]
      [===========>.........]  recovery = 59.6% (11625728/19479232) finish=0.6min speed=200064K/sec

md1 : active raid1 sdb3[2] sda3[0]
      949273408 blocks super 1.2 [2/1] [U_]
        resync=DELAYED
      bitmap: 0/8 pages [0KB], 65536KB chunk

unused devices: <none>
If at any time you see:
md1 : active raid1 sdb3[2](S) sda3[0]
      949273408 blocks super 1.2 [2/1] [U_]
      bitmap: 0/8 pages [0KB], 65536KB chunk
(look for the (S)) the old drive is too worn out for the resync to happen. Please contact support for further instructions.
After about one and a half hour, you should see again:
Personalities : [raid1]
md1 : active raid1 sda3[0] sdb3[1]
      949273408 blocks super 1.2 [2/2] [UU]
      bitmap: 0/8 pages [0KB], 65536KB chunk

md0 : active raid1 sda1[2] sdb1[1]
      19479232 blocks super 1.2 [2/2] [UU]

unused devices: <none>
If it's the case, turn off the device by running:
halt -p
and unplug the power adapter.
# Step 8 - Replace the second SSD
Repeat Step 5 but this time replace the SSD labelled HDD2.
# Step 9 - Checks and rebuilding the RAID arrays (2)
After you SSH into the device again, run:
ls /dev/sd*
to check if the new drive is properly detected. You should see:
/dev/sda /dev/sda1 /dev/sda2 /dev/sda3 /dev/sdb
Go into the scripts directory:
cd nodl-2tb-upgrade
And run the script to setup the new /dev/sdb drive:
./setup-sdb.sh
You can check the progress of the rebuild by periodically runing:
cat /proc/mdstat
You should see something similar to:
Personalities : [raid1]
md0 : active raid1 sdb1[3] sda1[2]
      19479232 blocks super 1.2 [2/1] [U_]
      [===========>.........]  recovery = 59.6% (11625728/19479232) finish=0.6min speed=200064K/sec

md1 : active raid1 sdb3[2] sda3[0]
      949273408 blocks super 1.2 [2/1] [U_]
        resync=DELAYED
      bitmap: 0/8 pages [0KB], 65536KB chunk

unused devices: <none>
After about one and a half hour, you should see again:
Personalities : [raid1]
md1 : active raid1 sda3[0] sdb3[1]
      949273408 blocks super 1.2 [2/2] [UU]
      bitmap: 0/8 pages [0KB], 65536KB chunk

md0 : active raid1 sda1[2] sdb1[1]
      19479232 blocks super 1.2 [2/2] [UU]

unused devices: <none>
If it's the case, turn off the device by running:
halt -p
and unplug the power adapter.
# Step 10 - Put everything back together
Remove the L shaped bridge, put the jumper into the original position, put the internals back into the bottom half of the case, screw the 6 bottom screws. Then gently put back the top part of the case (ports side first, check that the HDMI port is properly aligned with the hole) and screw the 4 side screws back into place. Then, firmly reinsert the USB bridge.
# Step 11 - Use the newly available space
After the device is turned on, SSH back into it, become root using sudo su - and go back into the scripts directory:
cd nodl-2tb-upgrade
Then run the script that will resize the partitions:
./resize.sh
Follow the instruction on screen, when asked to enter the unlock password in the UI.
After a few minutes, you should see the newly increased storage space in the nodl UI.
Enjoy your "new" nodl!